Showing posts with label Photography. Show all posts
Tuesday, November 25, 2014
Cats and a doodle
I call this one Cat Nap. It is based on a photograph my sister sent me of her cat sleeping in the object that she (the cat) uses as a scratching post. Obviously not a post, but it is covered with material that is suitable for a cat to happily scratch. She likes to curl up and sleep in/on it. Well not when I am around, she is very shy around strangers, and for all I am a relative of her cohabs I am still a stranger. Also I usually visit in winter when she prefers to nap next to a hot air vent where it is much warmer.
This is a small drawing that I started last month as part of the #inktober challenge but quickly realized was going to be more work than I could easily do in a day. After working on it off and on for several days she is finally done. Size is 4.0 x 4.0 inches on Bristol Board smooth paper and done with my 4X0 technical pen. There are mistakes but for the most part I am pleased with how this came out.
Above is another of my neighbors strays. I photographed this one the other day, and I think it was actually hissing at me during this photo. Oops, but I did interrupt it having a snack. I used some of my Derwent colored drawing pencils for this drawing. It isn't a very large drawing (working in my 5 x 7 sketchbook) and the pencils don't hold a point very well so details aren't good. It was not easy to get the few I did manage. Still I rather like the pencils I just think I need to work larger with them so the lack of a sharp point isn't such a problem. As you can see they also don't erase terribly well, I was having problems getting the slope of the back both large enough and then the right shape and over did it a bit and then had to try and erase.
If you think you are seeing hints of color you are, as I used a couple of different drawing pencils for this and then added in some color from a few of my Graphtint pencils. The cat is mostly grey but there were some hits of a sort of rusty brown in some of its fur.
Eventually I hope to do this cat in pen and ink, but don't know if I will use this same reference. I don't recall seeing this cat prior to the day I photographed it and it may not hang around for me to capture it again.
Above is just a doodle, I was playing with my blue and grey .05 copic multiliners, and this is the result. Just pattern somewhat based on what I have been noticing on the Classic Greek vases I photographed and those whose images I have also downloaded as part of my research on classic Greek vase patterns. The mandala is waiting for me to get back to it while I do this research.
OK I admit a not very exciting photograph. But the sparrow taking off in the lower left is what I was after and pretty much captured in mid wing flap. To capture this image I put the camera in Manual AV mode, white balance set for sunny, ISO auto, and the F stop for 4.0, I had to lighten the image just a bit to post, but I often do that even when the camera is in total auto mode.
So the adventure continues. Our weather hasn't been really good for photos and the trees are mostly stripped of their leaves so subjects for photography are getting a bit slim. I want to take a trip into Boston and head over to Faneuil Market and see what I can come up with there, or even on the Common, the wading pool should be set up for ice skating soon, as long as the weather turns cold enough to freeze the ice, maybe after Thanksgiving.
That is it for today, per usual comments are welcome.
Labels:
Cat,
derwent pencils,
doodle,
November,
Pen and Ink,
Photography,
sparrows
Sunday, June 26, 2011
June Sketchbook Challenge Dwg and other stuff
Above is the pen and ink stage of my latest drawing, a goose being followed by some young goslings. A composite drawing from a reference photo (the bridge) and a couple of my photographs of geese. I am planning on painting it, I am just in the vegging state I sometimes get into with these works. I think I am deciding on colors, but it isn't totally a conscious process so it may just be nerves coming into play. Not sure I will do any masking prior to starting this painting, the larger background areas such as the pond don't need to have a solid color applied, in fact visible brush strokes are something I will be going for.
The path is another large area to be painted but again here I will be using various colors so I don't think I need to mask the goose or the goslings, though I may mask the goslings to just make sure I don't over paint them with a wrong color.
Below is a pencil drawing I have been working on for the Sketchbook Challenge theme for June.
The theme for June is Pathways. The image above is drawn from a photograph I made this spring at the MA. Audubon Daniel Webster site. It is of a boardwalk moving through a small grove of trees. The sun was coming through the leaves creating patterns of light and dark. I am not sure if I am totally done with this. I think I need to let it sit a few days and then compare it again with the photograph. Drawing woods is not as easy as you might think, but hopefully I have pulled it off here.
Below is a composite image of four photographs I made yesterday at Massasoit State Park. After several days of clouds and rain the sun finally came out yesterday afternoon and I was able to enjoy some time with the camera. More photos from this outing will be posted on my Facebook Fan Page.
Upper left photo is of some Black Eyed Susan's with Daisy Flea Bane. The upper right photo is of a bumble bee on some Purple Vetch (or it might be Cow Vetch). Note that orange packet of pollen she has collected. Probably from the Day lilies that were blooming not too far away. The lower left photo is a mushroom with some ferns, no clue what the mushroom is. The last photo on the lower right is Lake Rico, a view across the lake showing the blooming Pickerelweed.
However, I am wondering where are the butterflies? I have been photographing bees, dragonflies and other insects but I am seeing very few butterflies. Maybe it is still a bit early for them, or perhaps the bug spraying from last year has hurt their numbers. I have yet to see a monarch butterfly, and even the cabbage butterflies seem a bit scarce. Ah well, not much I can do about it, but I did want to comment. Enough for today. Per usual comments are appreciated.
Labels:
Drawings,
June,
Pen and Ink,
Photography,
Sketchbook Challenge
Friday, June 17, 2011
Clematis Finished
The clematis colored pencil drawing is done. Well, as done as I am going to make it. I am sure I could have done more fussing with it and even improved on what I did. But as far as I was concerned it was time for it to be done. I don't think I am cut out to do photo-realistic drawings. The above is about as close as I want to come I think. Not bad but I have seen much better works shown in the Colored Pencil Forum at WetCanvas.
Even at the size I was working (drawing area 4.5 inches square) this drawing took hours to finish, and I wasn't even attempting a realistic background. In the end I did use a black colored pencil to help darken some areas and to add an edge to the petals. It like most of my recent drawings/paintings was done on Hot Press Watercolor paper, the 140lb weight.
I have started another pen and ink work that I will hopefully have done by the next blog posting. In the meantime we finally had a sunny day and I took advantage of it to drive out to Stony Brook, one of the MA Audubon sites. Below are a couple of photographs I made that day. More photographs are on my Facebook Fan page in the Summer Photograph album, and I will probably be adding them to my flickr albums in the next few days.
I have no clue what the insect above is. It flies and sort of looks like a butterfly, but the wings were a bit strange, I don't think it shows in the photograph but it was like it had double wings. One set is down with the round lobes and the 2nd set is more vertical, you can sort of see an edge along the left side of the body. And note how fuzzy the body looks. If anyone knows what it is please leave me a comment. It wasn't very big, maybe an inch across.
The photograph above is of what probably was the mill pond at Stony Brook back in the day. This photo is about as close as I am going to get to making a photograph of a Great Blue Heron without a telephoto lens. That fuzzy gray area in the center left is a Great Blue flying across the pond. When I approached one edge of the pond he took flight and I attempted the photograph. Someday maybe I will be able to afford a lens, then I will actually be able to photograph birds, in the meantime small blurry images are where I am at. Still it was fun to see him/it, I don't know if they have a nest here or just look for food but they can often be sighted at the edges of one of the ponds.
Enough for today. Comments and questions are always welcome, and I would really love to know what that insect is.
Tuesday, May 31, 2011
Figure Drawing and more EDM
Last nights figure drawing. I was fairly satisfied with it last night, but today is another story. Oh well, there is always next week. Actually next week should be interesting. Scott is off to school for 8 weeks so one of the models is going to run the Monday night sessions the same as last summer. Just occurred to me that I have now been attending these Monday night sessions for a year. I am not sure I am seeing much improvement lately, but I do know that I am faster with my drawings, and feel I have more confidence. No longer am I afraid to draw the human form, dressed or undressed. So I have to say the effort has been worth it.
The model last night while lovely in a pose with great lines was a bit difficult to draw, she was twitchy. She kept moving her hand or her foot or..., and tended to keep her eyes closed. So there are parts of this drawing that are unfinished or are my guesses, and I know I don't have the face quite right, which is why my satisfaction level has dropped with this drawing.
Below are my more of the Every Day in May challenge drawings.
Drawing 128 was to show an interior of a room through a doorway from another room. The room is my bedroom from my kitchen. Done with graphite and fairly quickly as drawing rooms is not my favorite thing to do. For 129 we had to draw people doing something, I used the top left photograph below as reference and drew a man and his wife fishing. Well, he is fishing and she is sitting and enjoying the breeze and the view. The last drawing above, 130, is of school supplies. I dragged out a couple of notebooks left from the classes I was taking last year, added a pencil and eraser and did a quick sketch.
One more day to draw. I will post that one on the blog when I do the next update. In the meantime below are 4 photographs that I have made since the last blog update. Need I say that actually I have made over 100 photographs but am subjecting you to four. I try to be selective with the photos I show on the Bog as I know they can get boring.
The top left photo was made at the Cape Cod Canal last Friday. I drove down to the Cape on Friday and because of the traffic I stopped at the rest stop along the canal for a bit. I used this photograph for the EDM challenge drawing and also feel it gives you a good idea of what the canal is like.
The photograph in the upper right was made on the Cape at the MA. Audubon Long Pasture Wildlife Sanctuary. It is a view of the Sandy Neck lighthouse across Barnstable Harbor.
The photograph just underneath of the Rhododendron was also made at Long Pasture.
The last photograph in the bottom left was made at Daniel Webster Wildlife Sanctuary yesterday afternoon. The building is a informational structure with a large window that looks out on a bird feeding station. Yesterday I saw a couple of wild turkeys, goldfinch and I think a Cardinal feeding. Further out in the fields I could see and hear Bobolinks. The males were in their spring black and white plumage. Sorry no photographs of birds, I need a telephoto lens for that. The Canon is good but not that good. I have posted additional photographs from each location to my Facebook fan page and to my flickr account for anyone interested.
That is it for today. Hope everyone here in the States had a good Memorial day weekend. Per usual comments and questions are welcome.
Tuesday, May 10, 2011
Tulips, photos, and drawings
Above is the finished Mothers Day Tulips drawing/painting. I finished the watercolor on this yesterday, after several days of hesitation on my part. Thinking about what I want to do, getting up the nerve, not sure why I sometimes delay finishing these drawings. Still whatever the reason it is now done and I have to admit I am quite pleased with this one. The scanner has made the reds more pink but otherwise colors are fairly accurate. Getting the colors just the way I wanted them took hours, and I don't see how I could have spent less time on the painting. When I have an underlying pen and ink drawing color has to be carefully applied so I can't use a really large brush with gesture. Maybe someday I will try that, though while I think I am improving my watercolor techniques not sure I am ready for that step.
I mentioned my latest drawing project last Friday and posted a couple of images. So far so good, meaning I have been keeping up with the drawings. I still have to do today's but thought I would post a composite image of the last 4 days. If you want to see the drawings by themselves and also see what the others in the group are doing feel free to visit the flickr group that has all the postings.
Above is my figure drawing from last nights session. I rather like it, except I should have placed it on the paper 2 inches to the right. When I realized I had the placement wrong I was at a point where I didn't want to start over so decided that if I had to cut off a foot so be it. Otherwise it was a good evening, and in a way a funny one. Usually most of the artists who attend these sessions are male, but last night there were 3 other women besides me, and only 2 other men, so of the 7 of us there there were 4 women and 3 men, not counting the model. Who know why, and things can flip again next week so that we go back to the more usual group of more men then women.
Last group of images for today are from a photo session last Friday afternoon. Good thing I went then because the weather has been mostly cloudy/rainy since and I haven't been out making any new photographs.
All three of the above photos were taken in Massasoit State Park in East Taunton, MA, and all show signs of our advancing spring. This was my first visit to the park, and it took me a bit of wandering around lost before I finally found the entrance. There are some signs but they (per usual in New England) are only slightly helpful. However, it was worth the wasted gas to finally find the park, and now that I semi know where it is, hope to go back.
Enough for today. Per usual comments or questions are welcome.
Monday, May 2, 2011
May Day
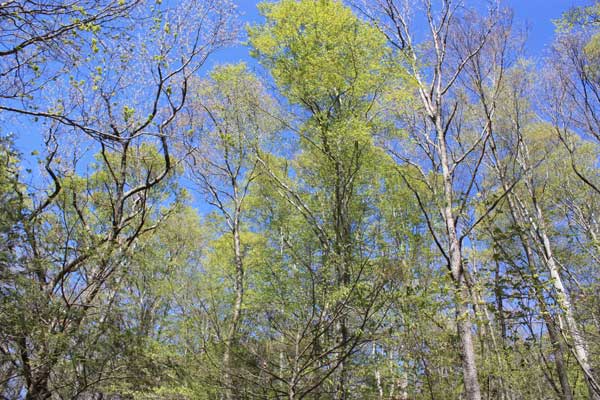
I don't usually do a Monday Blog update, but yesterday was May 1st and I was out making photographs to document the progress spring is making here in the Northeast. So I thought I would share a few. All were made in different sections of the Blue Hills Reservation area. The above is just trees, but I love the colors and shapes of the leafing trees against a blue sky.
A photograph of the area outside the Food Pavilion at Houghton's Pond.
I photographed this Magnolia a week ago when the blooms were just buds, yesterday it was in full bloom. You can see some of the petals have been damaged by our recent rain storm. I think the pink/white is so beautiful against the blue sky. The young tree is in the picnic area at Houghton's Pond, Blue Hill's, Milton, MA.
A last image, an unknown type bush blooming against the backdrop of Hougton's Pond, Blue Hills, Milton, MA. Other than cropping these photos they have not been altered in any manner. Comments welcome, tomorrow's post will be back to my art.
Tuesday, April 26, 2011
Butterflies and Figures
Above is last nights figure drawing, obviously she took a curled up pose, in fact it was a bit more curled up then was comfortable for her so after the first break she took a slightly different position. That is why I have concerns about her feet. I think the one pushing against the couch is slightly too large, though because it is closest to me there is some change in scale. What is closer to me will be larger than what is further away so I may have it correct after all. The leg that is under is the one that was repositioned so I couldn't go back and refine my original sketch of that foot. I suppose I could have erased and redrawn the leg, but I liked the original pose so stuck with it. Otherwise I am fairly happy with the drawing this week. I admit that I prefer to draw a model who isn't as skinny as our model last week. This model is slender but not skin and bones.
Below I have another of my pen and ink with watercolor drawings:
This drawing is of two butterflies perched on flowers. I took liberties with both the butterfly and flower coloring and added the leaves. Of course fills for both butterflies and flowers aren't realistic either, though the outlines of both are fairly accurate. I had fun painting the background to give the feeling of a field of wildflowers. I though purple flowers would contrast nicely with the green background.
The last image for today is a selection of photographs I made since the last blog update.
The photo subjects are Magnolia buds in the upper left, Weeping Cherry blossoms in the upper right, a man fishing on Houghton's Pond, Milton and a Trout Lily just starting to bloom. I need to get back to Blue Hills and see if the Trout Lilies are finally really blooming. When I was there last Friday only a very few showed buds at all and you can see that they weren't very open. We had a lovely warm Easter Sunday (in the low 70's) so it is possible that they are much further along. Yesterday was chilly and overcast till late in the afternoon, and this morning was foggy with some rain. Trees are finally really starting to leaf out and grass is turning green so I think Spring is finally here. There are more photos in my Facebook Gallery.
The community college where I attended classes is going to have their 3rd Annual Art Fair. The Fair includes a juried art show. I am thinking about submitting a couple of pieces (I can submit up to three) but am not sure which ones to pick. Ones that have watercolor washes I think, the watercolor gives a more professional look to the pieces. But choosing just 3 is going to be difficult. I am open to suggestions, along with other comments. That is it for today, till next time, be safe and well.
Labels:
April,
Butterfly,
Figure,
Flowers,
Photography,
watercolor
Sunday, October 31, 2010
More Fall Photographs
I was able last Tuesday to get out in the afternoon for a walk and to make some photographs. A good thing as we had another storm come through, and that took down most of the leaves that had turned colors. There are a few pockets of fall color left but not many, so enjoy these photos. Above is a tree in my neighborhood, a lovely old maple all red and orange.
These gold trees are along the walkway at the bottom of the town reservoir. The Building to the left through the branches is a pumping house. I was out towards the end of the afternoon and you can see how the west sun lights up the leaves.
I rather liked the contrast of the red leaves against the yellow/orange of the trees across the water. They were lit by the sun and seem to just glow.
By the time I made this photo the sky was clouding over and the light wasn't as good, still you can see the lovely red of the leaves on the tree to the left. I did use Photoshop to adjust the light in the last photograph, the others are only cropped as I had enough light when I was shooting.
Tuesday, October 19, 2010
October 18 Drawing & more photos
Above is last nights drawing. We had the same model that we had a few weeks back, but this time the pose was much better, at least from my position. This is the model that I only did head and shoulders of the last time I was drawing her. I am fairly pleased with how this one came out.
What was fun about last night was that we had a good group of participants unlike last week when there were only 3 of us (not counting the model) The total turn out last night was 8, including Scott but not including the model. Of the 8 artists 6 were painting, but each artist used a different style/approach to their painting, and the differences weren't simply based on different views of the model. One artist was outlining her figure in black, she ended up leaving the face blank with no features. This creates a rather flat image on the canvas. Scott suggested the artist might want to check out the paintings of Alice Neel, an American artist who died in 1984. She was known for her portraits, but they aren't pretty studio images, rather they are dynamic abstractions. Scott takes a rather abstract approach to the figure, working with large blocks of color. Another artist widened the body and made the models head relatively small. A third painted just the head and upper torso, similar to what I was drawing a few weeks back. The last two painters were going for realistic and both manage to create successful images.
I can admire the abstracted works of other artists but since I am still struggling to create accurate renderings I think I will stick with that for a while longer.
Prior to attending the studio session I drove over to North River, a MA Audubon site. I was there last Monday and was interested to see what changes had taken place in the week. The tree below was still green last week, with maybe just a couple of leaves changing color, I love those New England stone walls.
Since we haven't yet had a hard frost there are still a few flowers blooming.
Below are some leaves fallen onto the wooden walkway that leads to the river view dock.
That is it for today's post. Only the one drawing because I have been working on my challenge quilt. I am trying to have it done prior to getting our new challenge this coming Friday. When it is done I will update the blog with images. In the meantime comments are always welcome.
Labels:
Drawings,
Fall,
Figure,
October,
Photography
Wednesday, May 19, 2010
Life Drawings & Other
I will do the "other" images first then show off a couple of the life drawings I did last night. Above is a photo of the page spread in my Resume Booklet. The book I used for the photograph was one of my mock up pieces, so there are mistakes (which you aren't seeing) and I used different paper for the final version. But this image shows how the pages were laid out, though the final version does have the page numbers moved toward the center about a 1/4 of an inch, putting them in line with the red vertical rule. You can see where I made the holes for the thread in the Coptic Binding, though this isn't the center spread so you don't really see the thread itself.
Next Image for you is a photograph I took in the local park the other day. They have swans on the lake, I thought they had all mated pairs but I only saw this one on Monday so now I am not sure. Photo has been cropped but otherwise is as shot.
I think I have mentioned before that the Drawing Instructor at Massasoit has a studio fairly near me where he has life drawing sessions with models. I finally got my act together and went to the Tuesday night session last night. It was fun, though I am a bit rusty drawing a live model and a lot of the drawings I did aren't very good. Still I think I will be doing this again. It gets me out and about, and I get to practice my drawing, all good things. I have 3 drawings for you, they all have their faults, we were doing short poses - starting with 2 minutes and going to 5 minutes so all I was trying to do was capture the energy in the pose and have body parts in the correct place and size relationships.
Our Model last night is a Belly Dancer so she is slender and very fit, which actually makes her a bit harder to draw. I think these are all 5 minutes poses done after I had warmed up a bit and before I got too exhausted.
On another front I have actually been doing some sewing, making a potholder. Right now I am thinking about doing a blog post on how I put the potholder together so that will probably be my next post, sometime later this week.
For now that is is. As always comments are welcome.
Labels:
Drawings,
Graphic Design,
May,
Photography,
Swan
Friday, April 30, 2010
Photos and Etching, 100th post
Above is a scan of my final etching print of Mira installed in her bag. I like her face but am still not happy with the body on the right side, the fur isn't represented quite correctly. Oh well, I am running out of time to work on this plate so this is going to be the final version for now. Maybe I will get access to a press again sometime and be able to do more work on her. The plate was done with a combination of hard ground etching, aquatint, and engraving. Printing was done la Poupee, meaning I applied 2 colors to the plate prior to wiping, Mira is a Burnt Sienna and the background/bag is black ink. The finished color difference is slight but there and was done to unify the cat as one image. Sorry for the shadows, the paper is wavy because of how it dried, when the ink drys I can press it flatter but right now I need to let it do its thing. I know I could take the shadows out with Photoshop, but I really don't want to spend that much time on the photo. I have one more plate to print, this last one is of Jack in the Pulpit plants in flower. I will be printing it Tuesday so I will have a scan of it later next week.
I am still adding color to the soft ground plate but will have that done over the weekend and should be able to post a scan of that print with the Jack in the Pulpit. I am not thrilled with the subject of that plate, I think it takes me a while to absorb how to best utilize a new technique in my work and the soft ground was a new technique for me.
Next are 4 of the photos I turned in for my last Photography assignment, they were taken in color and I converted them to black and white in Photoshop. No other Photoshop work was done to them except for cropping. I really like the Red Line Terminal photo, I think that works on several levels. The trip to Boston really allowed me to take more interesting photos than I would have been able to do if I had stayed in Brockton.
Christopher Columbus Statue in Christopher Columbus Park in Boston
Quincy/Adams Red Line Terminal
Quincy Market, South Market, Boston, MA
Building with Statue in Lobby, Boston, MA.
There were 2 more photos but these are the best. I am sorry I didn't write down the name of the building in the last photo. The one element I am missing here is a person, it would have been a better photo for my assignment if there had been someone in the lobby. Ah well it was a late Saturday afternoon and that would have been asking for a bit much. I was lucky to have cars on the other side of the street.
That is it for this posting which is believe it or not, my 100th blog post. If I were like some of the Bloggers on the Art Quilt List I would have a give a way. Maybe when I reach 200 I will give something away. In the meantime comments are welcome. Let me know what you think of my photos.
Sunday, April 25, 2010
Photos to Share
Yesterday I took a quick trip into Boston with the purpose of taking photographs for my Photography Class. We are working on an assignment where we have to make some photos in the style of Andre Kertesz. Mr. Kertesz was born in Hungary migrating first to Paris then on the eve of the 2nd World War to America and NYC. He was an early adopter of the 35mm film camera and was one of those who developed the techniques of Photo Journalism. I think I have my photos for the assignment and will post them later in the week, but for today I want to post some other photos I have taken. Above is one I took yesterday along the Rose Kennedy Greenway. This is the park that is planted where the Central Artery used to be in Boston. Since Boston's Big Dig was a project to put that roadway underground it left the land above available for something. So far plans have called for making it into a park. Hopefully it will remain as one. These tulips were in full bloom yesterday and just beautiful. I hope the photograph captures that beauty, in the background you can see some of the other beds that were laid out.
This next photo I took a couple of weeks ago just as plants were starting to leaf out. This was taken in Brockton's Field's Park along the reservoir. The sun was shinning on these - well I guess they are flowers though I am not sure what the bush is, creating this soft glow. I used a shallow depth of field to have the flowers closest to us in focus but blurring the stems and leaves that are in the background. Other than cropping I haven't made any adjustments to the original image.
My last photo was also taken in Field's Park but this one was taken a couple of years ago during the summer. This is a photo of a blooming thistle against the water in the reservoir. For this image I not only cropped it but I did lighten it a bit so that the reflection of the trees in the water has more green, the dark line across the top of the photo is the far shore where the trees are standing.
I am not sure just where I stand on posting photographs to a blog. I am not going to start posting a photo a day as some have done. But I have taken some interesting photos and I do plan on taking more photos, which is partly why I took the class after all, so it doesn't make sense not to share them. So I expect that every now and then I will do a post like this one and share a few of the photos I have taken that I like the best. As always comments are welcome.
Friday, April 9, 2010
Photoshop Tips - Watermark a Photo
No art work this week to show, but in my Photography class we were going over lighting specifically for portraits, and in Photoshop how to add a copyright notice to photographs. Above is a photo that I have added copyright information to using Photoshop. It is really fairly easy to do, I would say almost the hardest part is getting the copyright symbol to show. I have CS3 at home and we were using CS4 at school, I am fairly sure the tip will work with older versions and maybe Elements as well, but I don't have access to those versions so I don't know for sure.
To add what looks like a watermark to a photo, you first open the photo in Photoshop. Then you select the Type tool and change your tool selection to the Type MASK tool, I use horizontal type as vertical type is usually really stupid looking and something I have been trained to avoid in Graphic Design. Select your font and font size (I used 200 for the image above) Click on your picture where you want to put the copyright information, for those who haven't used the Type Mask tool before it is OK that the layer turns red, just go ahead and type where the flashing curser shows up. First you want to create the © symbol. I have listed the various methods for Windows OS below, for Mac's I think it is Command g not sure what the Tradmark and Registered symbol shortcuts are on a Mac, sorry.
Windows Keyboard Shortcuts:
Copyright symbol = Alt 0169
Trademark = Alt 0153
Registered = Alt 0174
HTML
© "©"
™ "™"
® "®"
Note: for HTML coding leave out the quote marks.
So to get the copyright symbol on a PC in Photoshop press down the ALT key and type in 0169 on the keypad (make sure num lock is on) . Then type the rest of your copyright information, usually your name and the year. When you are finished press the check mark that is in the upper right hand menu bar, it is the Commit Edits selection. Now you should have your text outlined in what is referred to as marching ants, because that is sort of what it looks like. Next you want to copy this selection to a new layer, do that by using the menu option LAYER - NEW - LAYER VIA COPY (or Ctl J). Don't worry I know it looks like your text just disappeared but it hasn't. In the layers panel you should now see a new layer and it should be automatically selected. In the lower left area of the layers panel there should be a fx symbol (doesn't look exactly like the text) this is for attributes that you can apply to layers, click on it and a box will come up listing various options, select Bevel and Emboss. Just by selecting this you should now be able to see the text you typed on your Photograph. You can change the various sliders to make the text more obvious if you want. When you are finished just click OK and you are done. Now you can save the file, I usually just use save for web and then cancel any changes to my original photo but you can also save the photo as a copy or before you started making changes to your image you could have copied the background to a new layer and made the changes there. The JPG file format is called Lossy because it is a compressed file. Every time you save the file after changes you loose some information because of the compression. So I try to keep my original photos without any changes and if I make changes to a photo I just save that under a new name using SAVE AS. Do what works for you. So now you know how to create a watermark in Photoshop.
These last two images are the same photo, we were doing studies using light, and I took a photo of this doll with back lighting. Notice how dark her face is since I didn't use the flash. If I were photographing a person I would be using a reflector to the front or side to lighten their face but it can also be done to a certain degree by using Photoshop. All I did to the 2nd image was open the original in Photoshop then selected the following menu option - IMAGE - ADJUSTMENTS - SHADOW/HIGHLIGHT... The photo automatically lightened because of the presets, but you can also use the sliders to do additional adjusting. If you like the results you can press OK, otherwise use the cancel button. I think this option is very cool, and can be very useful exp. for photos like the one on the left above.
That is it for this post. I could have talked a bit about what I learned about lighting people for portraits but I think I will save that for another day. Hopefully for my next post I will have some art work to show. In the meantime comments are welcome.
Labels:
April,
copyright,
Photography,
Photoshop,
Watermark
Monday, March 8, 2010
Texture Photos and Braided Mandela
Above is my latest mandala. I am not sure what to call this, I used Celtic braiding techniques for some of the design elements but I also used other designs. I rather like the colors I used here. I find it interesting the way colors can modify each other when they are placed together. The green band on top of the orange really disguises the orange background. I finished it over the weekend and am now at a bit of loose ends. Not sure what the next project is going to be, but I am fairly sure I am not quite finished exploring the possibilities of the mandala.
The next images I have for you are from my Photography class. I have to turn in 4 photos this Thursday, so far I have narrowed down my selection to the following 5 photos. Not sure which one will be the odd man out. Comments are welcome.
The goal for the assignment was an exploration of texture and light. I chose as my subject for most of my pictures a glass bowl that I have had forever, in it I have a collection of marbles and small glass floats. The marble on top of the stack is a hand-blown glass marble that I purchased at the local Brockton museum a few years ago when they had a marble exhibit. I managed to take the photos one morning during a brief period of sun. I had to move quickly to get them as I had to go to a class, but I rather like how they came out. I have a southeast facing window which was perfect for giving me the light I needed for the photos. I placed the bowl on a sheet of white foam board and tried to photograph the bowl from different angles. The shadows are from a couple of my many plants, one hangs in the window and the other sits on the floor.
My 5th photo is a view of some blooms on one of my Christmas Cactus taken with another Christmas Cactus in the foreground. The focus point for this one was the stem of the foreground plant. I took a couple of others with different focus points. This is the one I like the best. Let me know which ones you like.
Labels:
Glass,
Jade Plant,
Mandala,
March,
Photography
Subscribe to:
Posts (Atom)